DPI stands for dots per inch and is also sometimes called PPI which stands for pixels per inch. Technically, DPI is for printing whereas PPI is for screens but in our context they are both used and just mean the same thing.
So basically, you just need to measure how many pixels your cursor moves when you move your mouse an inch.
Sounds simple right? It is, but there are certain pitfalls to avoid and details to keep in mind.
To learn more about mouse DPI and also about polling rates, read this excellent article by HowToGeek where they better explain the concepts and also answer more questions like which is the best DPI and polling rate.
We next present a quick step by step guide and then afterwards a section with more info and details.
Turn off mouse acceleration and custom speed settings
The first step is to turn off any mouse acceleration or custom speed settings that is done on the software side of things. Most operating systems will have those settings and you want the speed to be set to neutral and the mouse acceleration turned off.
Mouse acceleration makes the traveled cursor distance increase if the mouse is moved more quickly over the same distance. In other words, if you move your mouse one inch slowly, your cursor will travel less distance than when you move it fast. You definitely don't want this option turned on during this test so even if you prefer this setting, you must turn it off now and then back on again when done.
Custom speed settings make your cursor move slower or faster for the same traveled distance. This is basically there in the software for people to adjust mouse speeds to their own preference so for the same distance of travel and with the same mouse you get different results. You want this to neutral to get a proper measure.
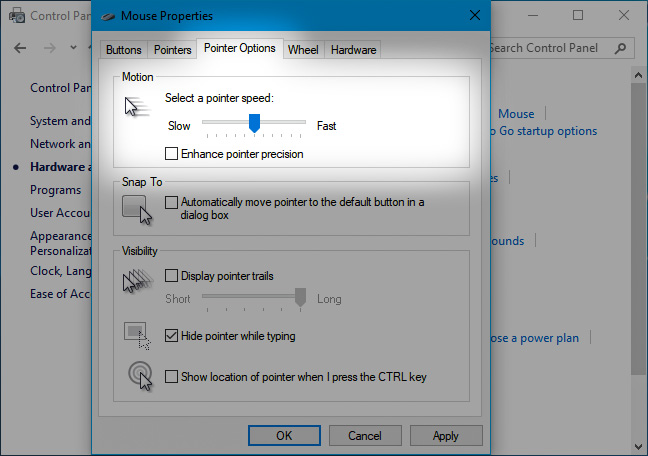
Under Windows 10 or mostly any Windows operating system, go to Control Panel, Hardware and Sound, and click on Mouse under Devices and Printers. Click the Pointer Options tab and:
Now you're ready to do your measurements with neutral raw mouse settings.
Measure your mouse's DPI using tools and software you already have
The first step is measuring the distance you want to make your mouse travel. To make things easier for you, try to measure 1 inch or 2.54 centimeters cause you're measuring how many pixels per inch. Get a ruler, place it above or below your mouse, and move your mouse accordingly. Some people also jot down pen marks on a piece of paper and place it on top of their mouse pad.
The next step is measuring how many pixels your cursor moves in that distance. You can use a ready made software tool like the DPI Analyzer by Mouse Sensitivity Dot Com or you can just as easily do the measurement within the Microsoft Paint program or similar. Just open your start menu and type paint and you should be right in.
Now, you want to jot down a straight line and know how many pixels that was while you move your mouse one inch. The easiest way is to:
Note that you can also make your mouse travel 6cm for example (let's say you have a mouse pad with lines on it and you know the distance is 6cm between those lines) and then just compute the DPI as such:
1257 pixels  ---  6 cm
DPI          ---  2.54 cm (1 inch)
Your DPI will then be 2.54 times 1257 divided by 6 which is equal to 532.
Now you know the exact DPI of your mouse.
Founder of SOFTKUBE, lead developer, and getting things done addict. Passionate about open source, user interface design, business development, and the tech world.
A small team of experts developing simple, usable, and high-quality web solutions. We blog about business, entrepreneurship, web development, and technology.
Custom Theme Migration from Drupal 9 to Drupal 10
How to Change the Most Recent Git Commit Message
How to Make Google Chrome Forget a Permanent HTTP 301 Redirect
Finding and Fixing Unintended Body Overflow to Remove Horizontal Scrollbars
Business Cheat Sheets CLI Design Development Downloads Drupal Email Google Apps HID Keyboards Multilingualism Open Source Philosophy PHP Pointing Devices Productivity Quotes Science Security SEO Technology Thoughts Windows Zend Framework